The FlexApp Packaging Console allows administrators to configure and prepare any applications that will need to be configured for users and made available as a department installed application from within the ProfileUnity Management Console. The FlexApp Packaging Console installer can be downloaded from the Administration screen of the ProfileUnity Management Console. Installation is easy and straightforward.
Important: The FlexApp Packaging Console has an additional bit-level requirement. The bit-level of the operating system on which you package applications with the FlexApp Packaging Console needs to match the operating system of the desktop to which you deploy applications. If you are packaging applications to be used in a 32-bit environment, you must use the Packaging Console on a 32-bit OS. If you are packaging applications to be used in a 64-bit environment, you must use the Packaging Console on a 64-bit OS.
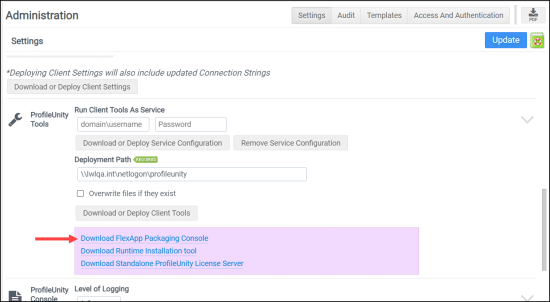
To download the FlexApp Packaging Console installer, complete the following steps:
- Open the ProfileUnity Management Console.
- Hover over your username in the top right corner of the screen.
- In the drop-down menu that appears, click the Administration option.
- The Administration screen opens with the Settings tab displayed.
- Scroll down to the ProfileUnity Tools section.
- Click the Download FlexApp Packaging Console link.
-
- Copy the file,
fpcsetup.exe, to the 32-bit or 64-bit machine on your network where you plan to package your applications.Important: This should be installed on a virtual machine that is not the same machine where the ProfileUnity Management Console was installed. Review the Software Requirements section of this guide for more information.
- Run the installer.
- The installer checks to see if any prerequisites need to be installed. If so, the Prerequisite Wizard welcome screen dialog displays. Click Next.
- Any prerequisite software that is needed is checked automatically. Click Next to install the prerequisite software.
- After the prerequisite software is installed, the FlexApp Packaging Console Welcome screen displays. Click Next.
- On the End-User License Agreement screen, select the I accept the terms in the License Agreement radio button, then click Next.
- Enter the folder on your local machine where you would like the FlexApp Packaging Console installed, then click Next.
- The FlexApp Packaging Console is ready to install. Click Install to install the software or Back to change any of your installation settings.
- The setup wizard installs your files.
- After the installation is completed, click Finish.
- Before starting the FlexApp Packaging Console to package your application layers, be sure your packaging virtual machine can be reset to its original state. You can do this in either of two ways:
- Take a snapshot: Taking a snapshot after the FlexApp Packaging Console has been installed but before packaging any applications allows you to revert to a “clean” machine state before packaging your next application. Rolling back settings prevents any cross-contamination of configuration settings or software dependencies in your packaging environment that can occur after running multiple installers.
- Set your machine to a non-persistent state: If the virtual machine is configured to be non-persistent, a simple reboot should restore it to its original state.
- Log in to the FlexApp Packaging Console by entering the URL of the ProfileUnity Management Console and your username and password. You can use the same credentials you created for the ProfileUnity Management Console account. If you are not using the ProfileUnity Management Console to manage your FlexApp package inventory and application delivery, you can select the Offline Packaging Mode option and enter a location for the packages.xml file instead of the Management Console URL.