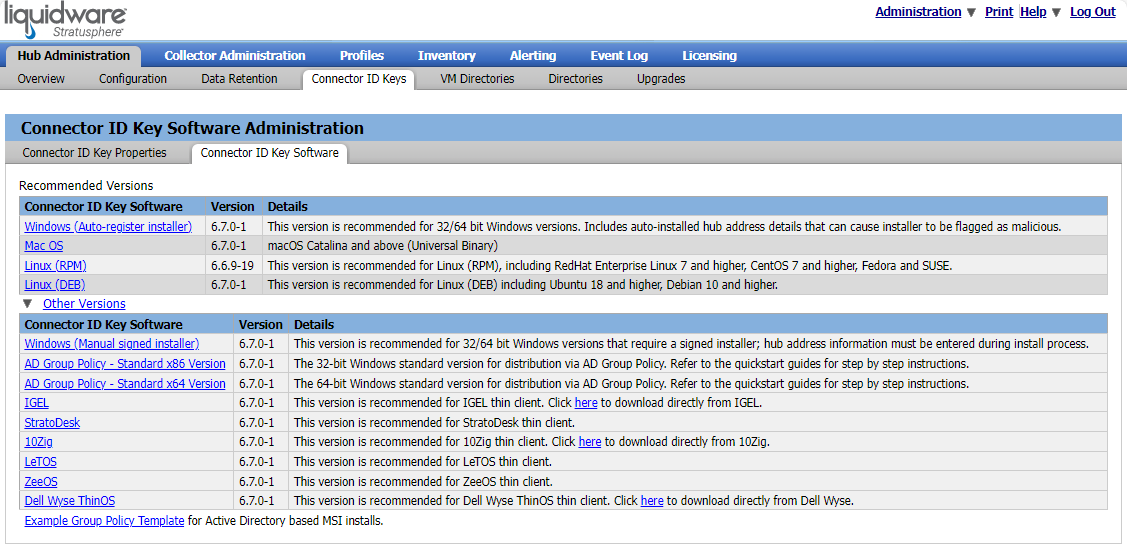
Connector ID Key software is included inside your Stratusphere Hub virtual appliance and must be launched on the end user desktops to gather assessment data. For Windows, there are EXE based packages that can be installed locally on desktops, and there are also versions that can be installed on a network server and then launched remotely on the user desktops. The software can be found in the Hub Administration module by navigating to Hub Administration > Connector ID Keys and clicking the Connector ID Key Software tab.
For evaluation, you can manually install the EXE on test desktops (refer to the earlier section on Distributing Connector ID Keys to Target Desktops for more details), but this section provides further details if you wish to distribute Connector ID Keys using Microsoft’s Active Directory (AD) Group Policy Object (GPO) or Systems Management Server (SMS). Local install and remote launch can all be done silently, without any intrusion for the end users. To remove the software, you can use the standard procedures to reverse the process described below, or as discussed in sections above you can simply set any locally installed Connector ID Keys to auto-delete themselves after a specified number of days.
If you have problems or questions regarding the steps described in this section, submit a request for more information on the Liquidware Support Portal.
Deploy the Standard Connector ID Keys with AD GPO
This section describes how to use Active Directory Group Policy to automatically distribute the “locally installed” Connector ID Keys to desktop machines or users. When distributing the Connector ID Keys using Group Policy, you should assign Connector ID Key MSI distribution to computers (Computer Group). For those computers, the Connector ID Key will be installed when the computer starts and will be configured as a service that is available to all users who log on to the computer.
Step One: Download the CID Key MSI and Example Group Policy Template
The Connector ID Key MSI and the template can be found by navigating to the Hub Administration > Connector ID Keys > Connector ID Key Software tab. You will need to download the following two files:
AD Group Policy - Standard VersionExample Group Policy Template
Important: This MSI is to be distributed using AD Group Policy only. Do not attempt to use any other distribution mechanism.
Step Two: Create a Distribution Point
To assign the Connector ID Key MSI, create a distribution point on the publishing server by completing the following steps:
- Create a shared network folder where you will put the Connector ID Key MSI.
\\file server\share\- Copy the Connector ID Key MSI file to the share.
- Set permissions on the share to allow access to the MSI file. Grant read permissions to either Authenticated Users or Everyone.
Step Three: Load the Group Policy ADM Template
The ADM Template allows Connector ID options to be specified through Group Policy. Refer to the figures below for further assistance.
- Right-click Administrative Templates under Computer Configuration and select the Add/Remove Templates option.
-
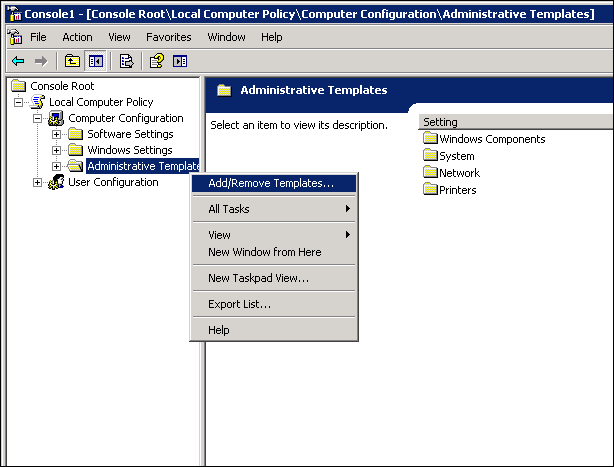
- On the Add Remove Templates screen that appears, click Add.
- Browse to the location where the Liquidware Labs template you previously downloaded is located. Click the filename, then click Open.
- After the template has loaded, click the Close button.
- At the top of the Console screen, click the View menu, then select the Filtering option.
- On the Filtering screen that opens, uncheck the Only show policy settings that can be fully managed checkbox.
-
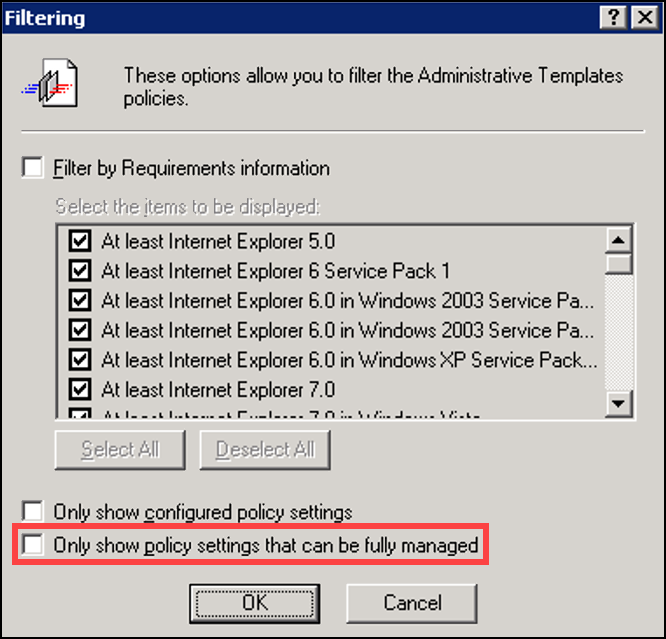
- Click the OK button.
- Back on the console screen, navigate to Computer Configuration > Administrative Templates > Liquidware Labs > Connector ID.
-
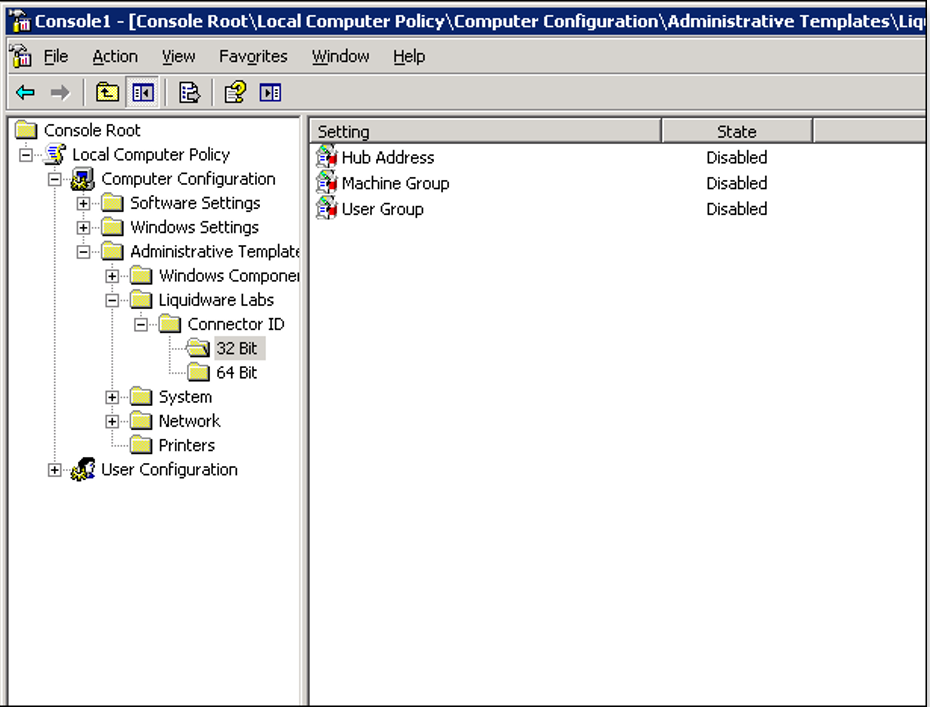
- Specify Connector ID options including the Hub Address for your environment.
Step Four: Deploy the CID Key Agent
In this section, you will create a Group Policy that deploys the Connector ID MSI package by completing the following steps:
- Right-click the Software installation option under Computer Configuration and select New > Package.
-
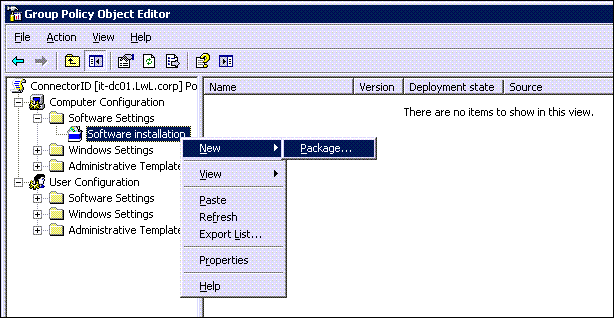
- Browse to the location where the Connector ID MSI is located. This path should be the UNC path created above in Step One: Download the CID Key MSI and Example Group Policy Template.
-
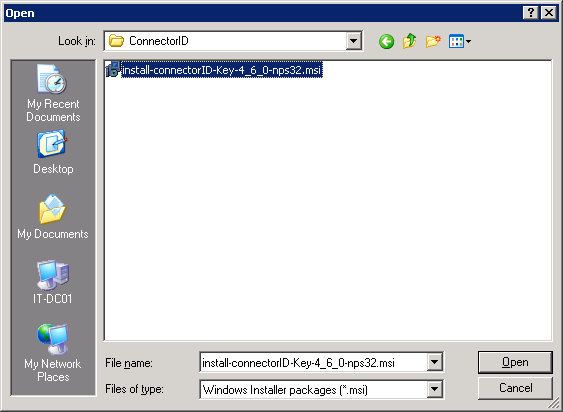
- Click the filename, then click the Open button.
- On the Deploy Software screen that opens, select the Assigned radio button, then click the OK button.
-
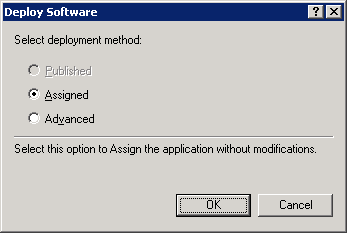
- Back on the Group Policy Object Editor screen, double-click the Connector ID package to open the Properties dialog box.
- Enable the Always wait for the network at computer startup and logon setting.
-
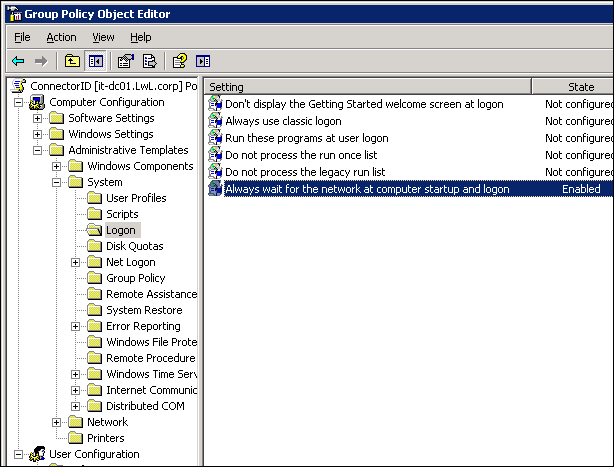
Deploy the Standard Connector ID Keys with SMS
This section describes how to deploy the Connector ID Keys in your environment by using SMS. This example uses the sample folder named \InstallerCache\CID, which is on an SMS host machine named SMS01. When you run through the deployment, you will need to change these to the actual names in your environment.
The Windows - Standard Version Connector ID Key can be found by navigating to the Hub Administration > Connector ID Keys > Connector ID Key Software tab and clicking the Windows (Auto-register installer) entry. You will need to download this file from the Hub to the folder you created on your SMS host machine.

To distribute the CID Keys using SMS, complete the following steps:
- Start the SMS Administrative Console and create a new package with the following attributes:
- Name: Connector ID Keys
- Version: 6.x.x (specify the actual version to be deployed)
- Publisher: Liquidware Labs, Inc.
- This package contains source files: True (selected)
- Source directory:
\\SMS01\InstallerCache\CID
- Use the default or site-specific settings for all remaining attributes.
- Create a Distribution Point for this newly created package according to your site needs.
- Create a Program specifying the executable installer package:
- Name: Connector ID Keys
- Command line:
- Copy
Install-connectorID-Key-x_x_x-winStandard.exe /s [HUBADDRESS=”hub-ip-or-dns-name”] [MACHINEGROUP=”machine-group-name”] [USERGROUP=”user-group-name”] Note: The
x_x_xin the command should be replaced with the version number of the CID Key you are installing. The last three parameters—HUBADDRESS,MACHINEGROUP, andUSERGROUP—are optional. If you use them, do not use the actual bracket characters[and]. However, the quotes are required and the variables inside the quotes should be replaced with values specific to your environment. The EXE installer already has information regarding the address of the Stratusphere Hub it was downloaded from and must register to. However, if you want to override this embedded information, you must specify theHUBADDRESSparameter and the installer will ignore the information it has internally. Also, if you want to specify a machine group and/or user group for automatic registration you need to specify the last two parameters.- Run: Normal
- Complete Connector ID Keys installation and registration using the following values:
- Estimated memory: 512 MB RAM or higher
- Maximum allowed run time: 20 minutes
- Program can run: Whether or not a user is logged on (suggest scheduling install when users are not logged on)
- Run mode/Run with Admin rights: True (selected)
- Create a new advertisement using the following attributes:
- Package: Connector ID Keys
- Program: Connector ID Keys Installer
- Mandatory assignments: Create one or more of these to force the installation of the package without requiring the user to run advertised programs. Use the default or site-specific settings for all remaining attributes.
- After the advertisement is created and the scheduled time for deployment arrives, client machines receive the advertisements and program installation begins. As the installations progresses, Stratusphere should display newly registered machines in the Stratusphere Hub under Inventory > Machines.
