The Stratusphere Hub, Database, and Collectors are all virtual appliances that can be installed directly from the Liquidware web site on Nutanix AHV. The Stratusphere Hub is the data collector and reporting system for VDI diagnostics, and it also includes the data collection software agents that will be deployed within the desktop VMs. The first step is to install the Hub appliance on an appropriate virtual host. Since this is a data collection and reporting appliance, it is recommended that you deploy it on a host appropriate for server applications; not a host used for virtual desktops (although for initial evaluation you may choose to share hosts but, in this case, note that Hub performance may be affected). The following instructions can be used to install the Hub as well as other the other appliances within your virtual environment.
Note: Only CID Key Collectors are currently supported on the Nutanix AHV platform. Network Collectors are not supported at this time.
Preparation
- Acquire administrative credentials to the Nutanix AHV environment for your organization.
- Use the Liquidware Stratusphere Sizing Guide to appropriately size the Stratusphere Hub appliance and Database appliance for your installation base.
- Identify the links to the Nutanix AHV files for the Hub, Database, and Collector appliances on the Liquidware Stratusphere Download page and keep them handy. If your AHV-based Nutanix cluster does NOT have direct access to the Internet, download the QCOW2 files to your local environment in preparation to be uploaded to AHV.
- Nutanix does NOT provide a virtual container format such as OVF or XVA. Thus, each QCOW2 must be uploaded separately first, and then virtual resources such as vCPUs, RAM, Disks, NICs, etc. need to be configured manually for each appliance.
Instructions
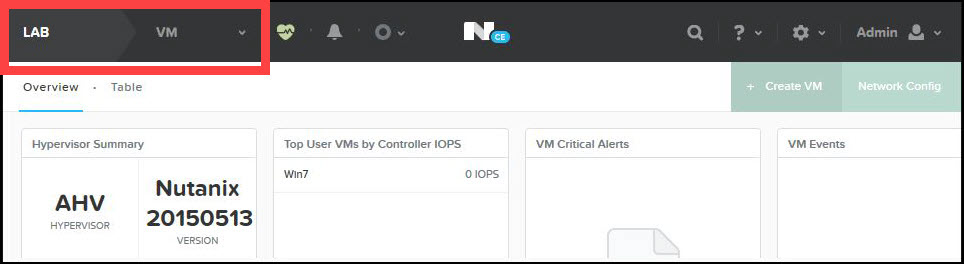
- Log in to your Nutanix cluster using your administrative credentials.
- Make sure you select the appropriate Cluster > Home on the top left of the page.
-
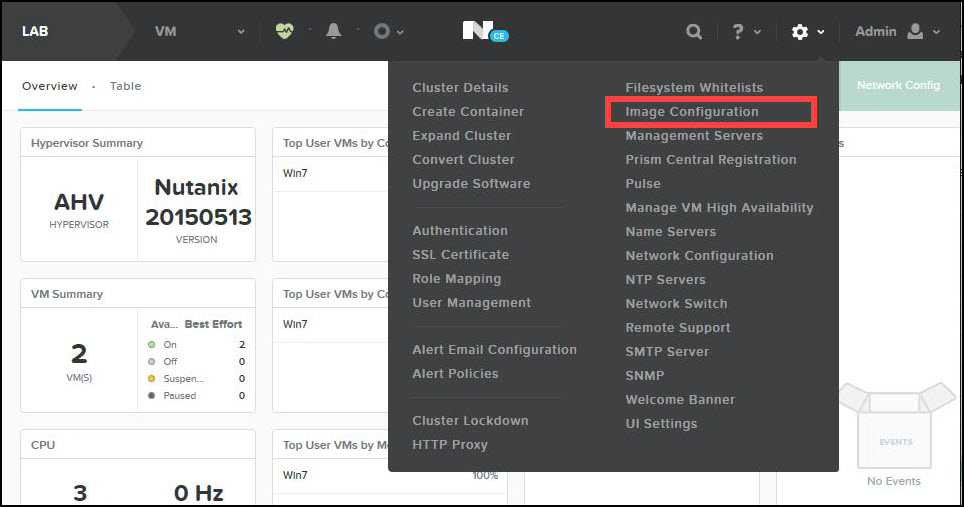
- Click the
 (Settings) icon in the top right and select the Image Configuration option in the drop-down menu.
 -
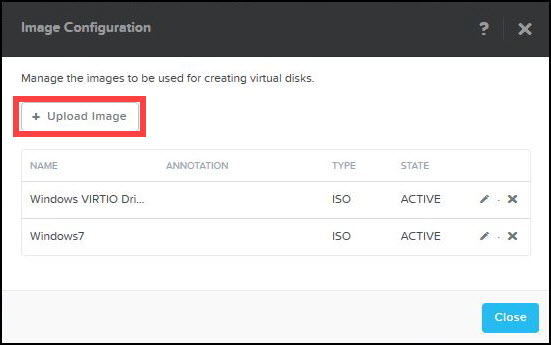
- In the Image Configuration window, click the Upload Image button to upload the appliance QCOW2 images.
-
- The Create Image window opens.
-
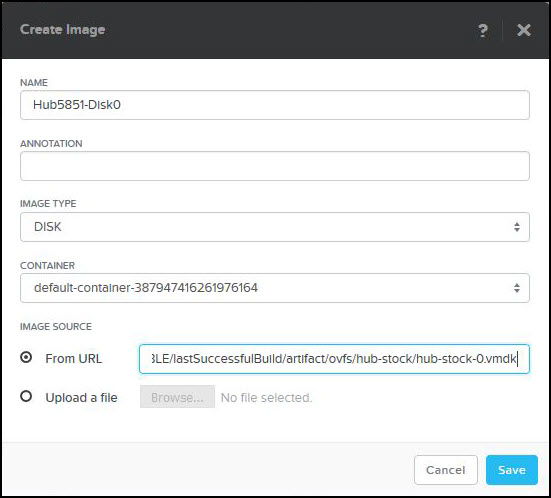
- Enter a unique name for the disk image.
- Select Disk in the Image Type drop-down list.
- Leave the Container field set to the default.
- In the Image Source field, if your Nutanix AHV cluster has access to the Internet, choose the From URL option and paste in the link to the first disk or Disk0 of the appliance. If your environment is isolated from the Internet, choose the second option, Upload a file, and browse to your local desktop to upload the Disk0 QCOW2 to your Nutanix cluster. Repeat this step for each disk for each appliance you intend to use.
- Click Save. The disk image is then uploaded from the Stratusphere Download location to your cluster. Depending on the bandwidth available, this may take a minute or more.
- After uploading Disk0 for the Hub, follow the same process to upload the three remaining disks for the Hub, about five Disks for the Database appliance if required, and for the Collector as well. Keep in mind that these disk images need to be added to the Stratusphere Hub virtual machine in the right order, so make sure you use an appropriate naming convention for Hub, Database, and Collector QCOW2 images.
- After adding all four disks for the Stratusphere Hub appliance, it should look like the example below.
-
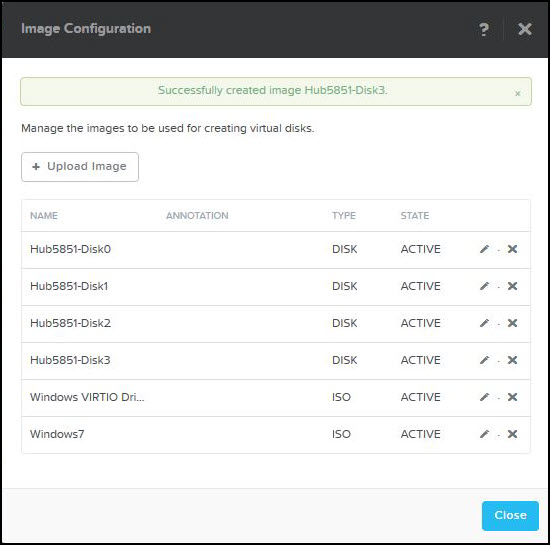
- Click the Close button to finish adding disk images.
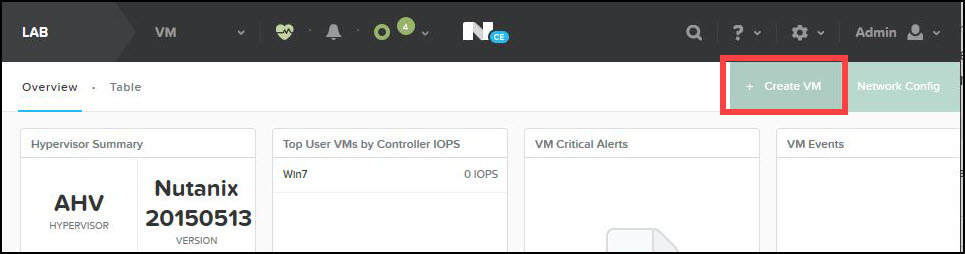
- Navigate to Cluster > VM and select the Create VM option.
-
- The Create VM window opens.
-
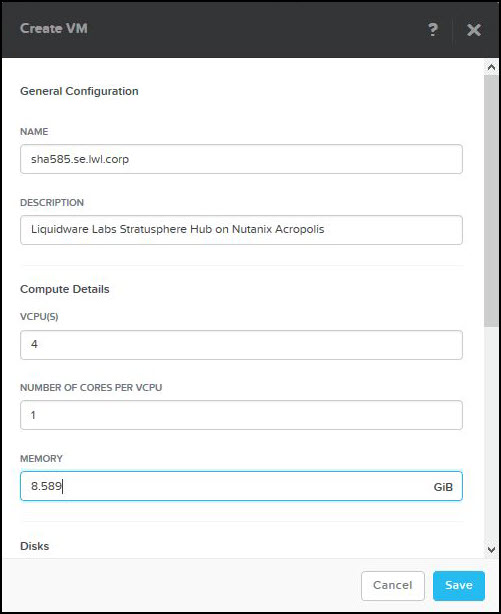
- Enter a name and description for the Stratusphere Hub appliance.
- Based on the Stratusphere Sizing Guide, enter the number of vCPUs and Memory recommended.
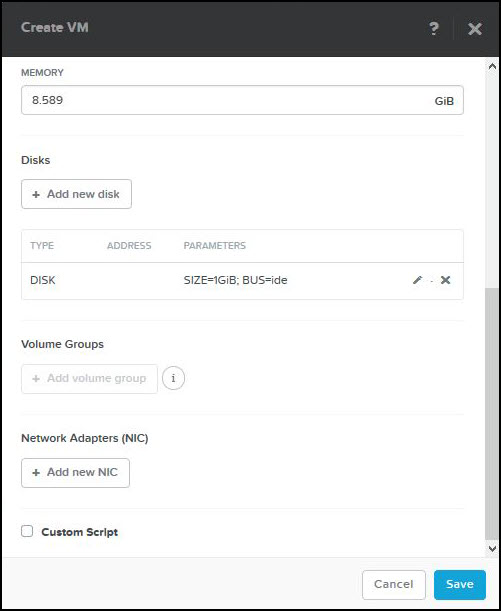
- Scroll down to see the Disks section. Click the x to remove the CDROM. It will prompt you for confirmation.
- Click the Add new disk button to add the first Disk0 for the Hub appliance.
- On the Add disk window that opens, complete the following sub-steps:
- Select Disk in the Type drop-down list.
- Select Clone from Image Server in the Operation drop-down list.
- Select IDE or SCSI in the Bus Type drop-down list.
-
Note: In older versions of Nutanix, the first disk, Disk0, had to be of type IDE, while each subsequent disk could be of type PCI for performance. There is no such requirement in the newest version of Nutanix.
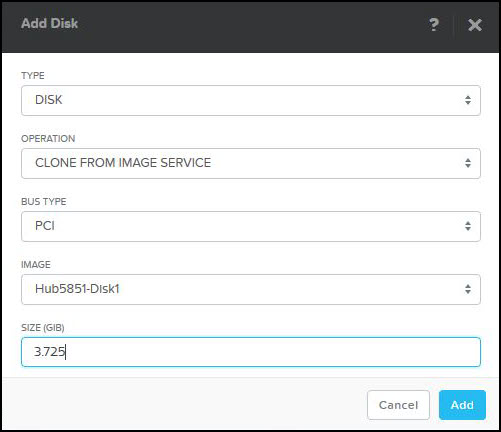
- Select the appropriately named Hub Disk0 and give it the same size recommended by the Stratusphere Sizing Guide.
- Click Add.
- After the first disk is added, it should look like the image below.
-
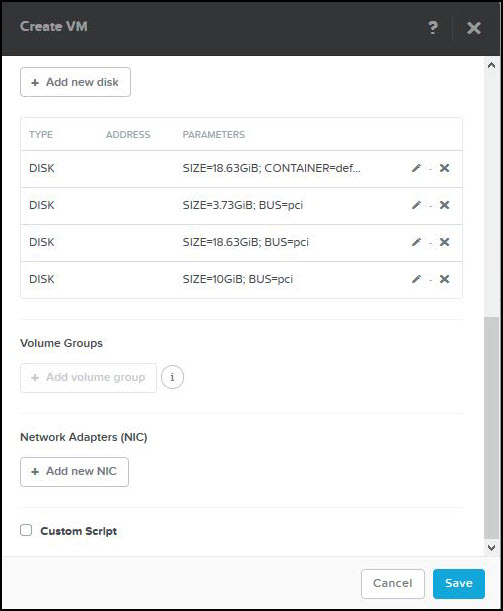
- Repeat the steps above to add three additional disks to the Stratusphere Hub appliance, five disks for the Database appliance if required, and ones for the Collector appliance. The following is an example of the second disk Disk1 being PCI of Bus Type.
-
- After all the disks have been added, it should look like the example below. Click the Add new NIC button.
-
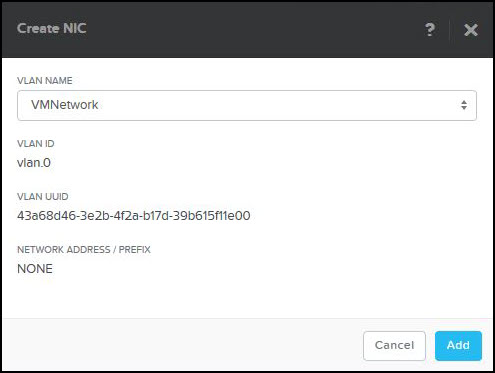
- In the Create NIC window, select the appropriate VLAN Name you want the Hub to be on and click the Add button to finish adding the NIC.
-
- The Stratusphere Hub virtual machine is now fully created. Click the Save button to finish creating the VM.
- Use the same instructions to install the Database and Collector appliances, then use the standard instructions to configure and join/register them with the Stratusphere Hub appliance.
- Select the Table view under the Cluster > VM tab.
- Select the newly created Stratusphere Hub appliance and choose the Power On option to boot the Stratusphere Hub appliance.
- Before starting to use Stratusphere appliances in production, use the Liquidware Stratusphere Sizing Guide to appropriately size the Stratusphere Hub appliance and Database appliance for your installation base.
-
Note: All resizing should occur after the first boot of the appliance.
- Click the Launch Console link to open a browser-based console of the Hub appliance. If you need to configure the appliance, Liquidware recommends using Microsoft Windows 10 Command Prompt to SSH to the appliance as outlined in the next section.