Note: For security reasons, scripts should be signed prior to being uploaded into the system.
To upload a script to CommandCTRL, complete the following steps:
Note: The following is not applicable to Mac support.
-
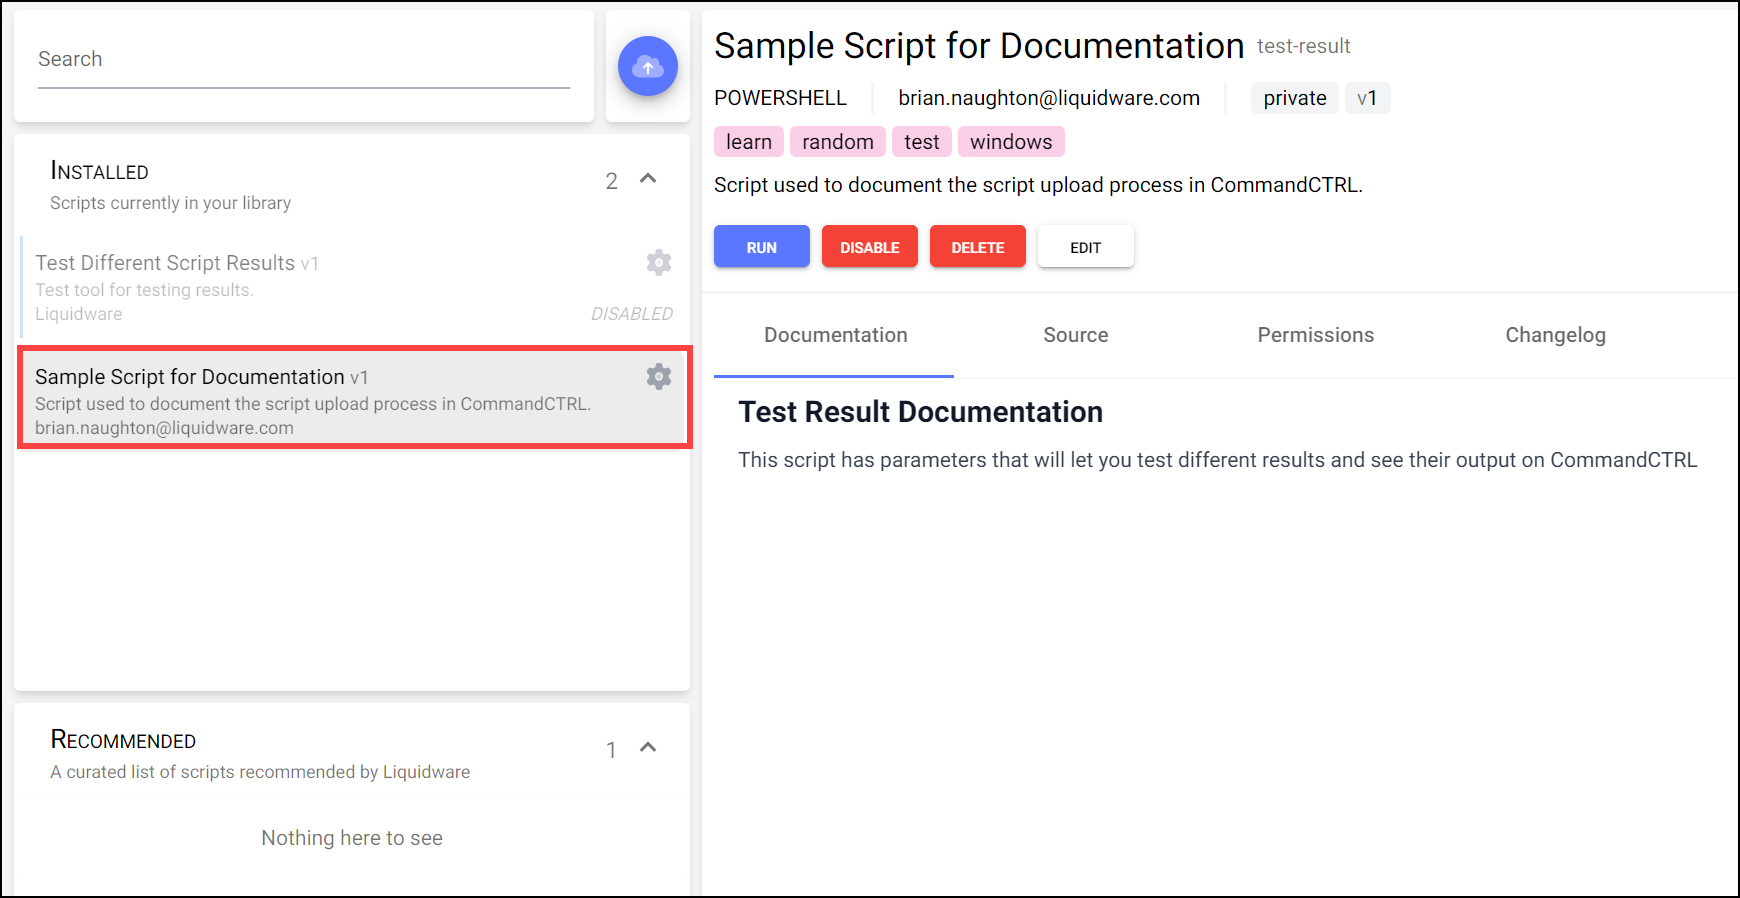
In the side navigation panel, go to Tools > Scripts > Store.
-
In the right pane, click the
 (Upload Script) button.
 -
On the New Script screen that opens, click the
 (Upload) button.
 -
Navigate to and select the file you want to upload.
-
(Optional) Select the Automatically use script comments to autofill fields checkbox if you want to have the fields pre-filled for you. If you select this option, you can still enter your own comments in some or all of the fields, over-writing the pre-filled content.
-
Click the Next button.
-
In the Detail field, enter an ID for the script or accept the default. If you enter an ID manually, it can only contain lowercase alphanumeric characters, dashes, and/or underscores.
-
Enter a name for the script or accept the default.
-
Enter a description for the script or accept the default.
-
Enter at least three tags for the script or accept the defaults. These tags will be used to find the script when you or other users are searching for it using the search engine, so the tags should be relevant and descriptive.
-
Click the Next button.
-
In the Parameters field, review any existing parameters and modify or delete them if necessary.
-
(Optional) Click the
 (Add Parameter) button at the bottom of the field to add one or more additional parameters.
 -
Click the Next button.
-
In the Documentation field, use Markdown syntax to enter a detailed description of what the script does. This information will appear under the Documentation tab when the script details are viewed in CommandCTRL.
Note: If you do not know Markdown syntax, click the link at the bottom of the screen to open a webpage that explains it in detail.
At any time, you can click the Preview button to see how the Markdown text you have written will appear online.
-
Click the Next button.
In the Permissions field, enter the name of all users and/or roles that you want to assign specific permissions to. For each user and role, select the permissions you want them to have: Read, Write, Invoke. Click the
 (Assign Permission) button to add the permission to the script.
Note: If you do not assign any permissions for specific users or roles, then all users and roles that have been assigned the script:update permission will have full access to the script by default.
After you add a permission, you can remove it easily by clicking the
 (Remove Permission) button beside the user or role name.
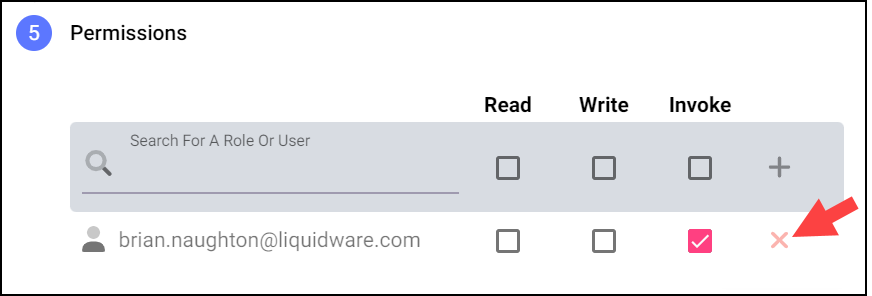
-
When you are done setting script permissions, click Create to add the script to CommandCTRL.
The script then appears in the list installed scripts on the Store screen.