Summary
ProfileUnity’s FlexApp Technology includes exclusive Click-to-Layer capabilities and Citrix Virtual Apps and Desktops and Microsoft RDSH session isolation for FlexApp application packages. FlexApp’s Click-to-Layer feature allows instant delivery of FlexApp layered applications on-demand upon the application open action by a user. The user clicks on the application’s native icon on the Desktop or in the Start Menu and the application is instantly delivered via FlexApp and is ready for use. The option improves desktop readiness times compared to other layer delivery options because applications are not mounted unless they are in use. Now even dozens of layered applications can be readily available in a user’s Windows environment without needing to actually layer every available application that might not be used during a user’s session.
FlexApp’s Session Isolation feature provides enhanced delivery support providing session-based layering for published applications running on Citrix Virtual Apps, Microsoft RDSH, and Microsoft RemoteApp. Before, all applications published on a server were visible to all connected users whether they need them or not. Now when FlexApp applications are delivered to a user’s published desktop, other users are not automatically exposed to those applications. Every user’s desktop can remain unique, even for users on the same Windows Server environment.
Click-to-Layer in a server environment offers an additional advantage. The first user to request an application to open will experience a slight delay as the FlexApp package is layered into the environment. However, after the application is layered into the server environment, the process does not need to be repeated. Subsequent users will not experience any delays on an application open.
This document explains how to configure FlexApp’s Click-to-Layer feature for published applications.
Updating FlexApp Settings for Click-to-Layer with Published Applications
Before configuring Click-to-Layer with your preferred method of publishing applications, complete the following steps:
- Package your application with the FlexApp Packaging Console.
- If you have not already done so, click your username in the top right of the screen.
- In the drop-down menu that appears, select the Administration option.
- Scroll down to the ProfileUnity Tools section.
- Click the Download or Deploy Client Tools button.
- Enabling Click-to-Layer for published applications requires you to edit FlexApp configuration settings inside the
flexapp.zipfile that was just copied to the Deployment Path as part of the Client Tools. The default location forflexapp.zipis in the NETLOGON\ProfileUnity folder. - Open and copy out of the
flexapp.zip, from within the “CTL” folder, theJitCut.dll.configfile. - Edit
JitCut.dll.configand change the following setting from True to False: <setting name="Validate" serializeAs="String"><value>False</value></setting>- Replace
JitCut.dll.configin the FlexApp.zip\CTL folder with the modified version for published apps. - If the client software has previously been deployed to the end user machines in your environment, you will need to uninstall the existing client software. If the client software has not been previously deployed to the end user machines in your environment, the client software will be installed through a Group Policy computer startup script from the Deployment Path with the modifications that were made to
flexapp.zipfor FlexApp Click-To-Layer.
Next, you will continue the configuration process based on your choice of application-publishing brokers.
Citrix Virtual Apps
- Log in to Citrix Studio and navigate to Applications.
- In the Actions field on the right side of the screen, click the Add Applications button.
- Proceed through wizard until you get to the Applications screen.
- Click the Add button, then select the Manually option from the list that appears.
- In the Path to the executable file field, enter the full client-side path to the modified Click-to-Layer version of the
JitCut.exefile: C:\Program Files\ProfileUnity\FlexApp\CTL\JitCut.exe- In the Command line argument field, specify the path to the package xml, which is stored alongside the package that the FlexApp Packaging Console creates. Enter the path using the following format:
"\\MyServer\Share\Chrome_20170619\Chrome_20170619.package.xml" 0- The number at the end corresponds to the package’s shortcut index, 0 being the first <Link> in the XML file’s <Links> section. Change this value to launch different shortcuts or applications within this package.
- Fill in the Application name field.
- Click OK.
- The Add Applications wizard reappears.
- Complete the Add Application wizard and verify the application has been added successfully.
- In the Citrix Studio screen, right-click the Applications folder and go to Properties.
- On the Application Settings screen that appears, click the Delivery button in the left column.
- In the Application icon field, click the Change button.
- On the Select Icon screen that opens, select the Choose an icon from a file on a representative machine radio button.
- Select the
.icofile located in the package path. - Press OK to save your changes and verify that the new icon appears .
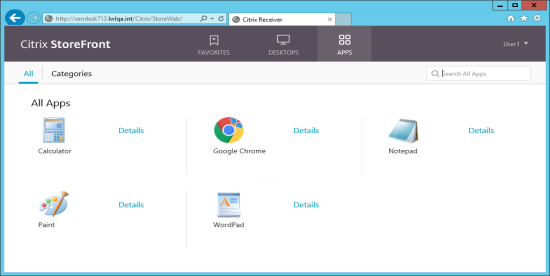
- The application can now be assigned and launched from the Citrix StoreFront screen.
-
VMware Horizon RDSH
- Log in to the VMware Horizon Admin Console.
- In the left column, navigate to Catalog > Application Pools.
- On the Application Pools screen, click the Add button to add a new application.
- On the Add Application Pools screen, select the Add application pool manually radio button.
- Enter an ID, Display name, Version and Publisher for the pool.
- In the Path field, enter the full client-side path to the modified Click-to-Layer version of
JitCut.exe: C:\Program Files\ProfileUnity\FlexApp\CTL\JitCut.exe- In the Parameters field, specify the path to the package .xml, which is stored alongside the package that the FlexApp Packaging Console creates. Enter the path in the following format:
"\\MyServer\Share\Chrome_20170619\Chrome_20170619.package.xml" 0- The number at the end corresponds to the package’s shortcut index, 0 being the first <Link> in the XML file’s <Links> section. Change this value to launch different shortcuts or applications within this package.
- Click the Finish button.
- The application can now be assigned and launched from the VMware Horizon Client.
-
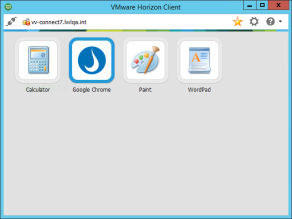
Note that starting with VMware Horizon 7.1, VMware has added support for changing the default icons for published applications. Both VMware Horizon 7.1 and PowerCLI 6.5 R2 are required. After installation, the icon can be changed by opening a PowerShell cmd prompt and performing the following steps:
- Load the required PowerCLI modules:
Get-Module - ListAvailable VMware.VimAutomation.HorizonView | Import-ModuleGet-Module - ListAvailable VMware.Hv.Helper | Import-Module
- Connect to the VMware Horizon connection server:
Connect-HVServer -Server your.connectionserver.com- Set the Application icon to an image file (.ico, .png, .jpg, etc.):
Set-HVApplicationIcon -ApplicationName Chrome -IconPath C:\MyIcons\chrome.ico
Microsoft RemoteApp
- Log in to the Microsoft RemoteApp server.
- In the left column, go to Collections > QuickSessionCollection.
- In the RemoteApp Programs field, click the Tasks drop-down menu and select Publish RemoteApp Programs.
-
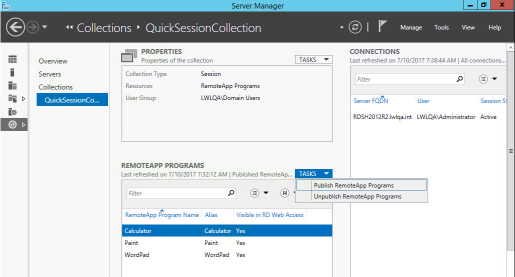
- The Publish RemoteApp Programs wizard starts. Click the Add button to add an application manually.
- Navigate to and select the modified Click-to-Layer JitCut executable:
C:\Program Files\ProfileUnity\FlexApp\CTL\JitCut.exe- Complete the Publish RemoteApp Programs wizard.
- In the RemoteApp Programs field again, right-click the new JitCut application and select Edit Properties.
-
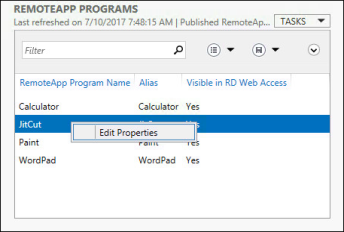
- On the General screen for the JitCut application, change the RemoteApp program name field to the name of the application intended to be published.
-
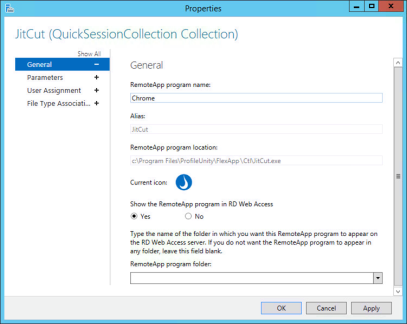
- On the Parameters screen, specify the path to the package xml, which is stored alongside the package that the FlexApp Packaging Console creates. Use the following format:
"\\MyServer\Share\Chrome_20170619\Chrome_20170619.package.xml" 0- The number at the end corresponds to the package’s shortcut index, 0 being the first <Link> in the XML file’s <Links> section. Change this value to launch different shortcuts or applications within this package.
- Click OK to complete the application configuration process.
- The application can now be assigned and launched from the RemoteApp portal.
-
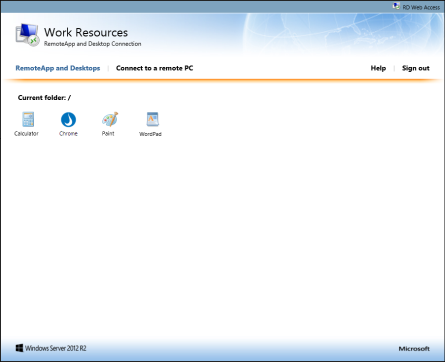
PowerShell can be used to customize the icon seen in the RemoteApp portal. To do so, launch a PowerShell prompt on the RemoteApp server and:
- Type the following to replace the application icon with a new one from a
.ico,.exe, or.dllfile: Get-RDRemoteApp -Alias "JitCut" | Set-RDRemoteApp -IconPath “C:\MyIcons\chrome.ico"- Log out of the RemoteApp portal and then log back in for changes to take effect.
