This section covers the process for adding Microsoft Entra ID control groups for commissioning and decommissioning FlexApp One applications with Intune. You can add multiple applications to a classic departmental group, but this method offers granular application control so you should try it initially before choosing a different method.
The following sections will show you how to create two Entra ID groups for the FlexApp Service with the following names:
- (Comm) FlexApp One Service
- (DeComm) FlexApp One Service
You will do so by using the FlexApp One installer, Installer.exe / Installer.intunewin, as an example.
In addition, you will create two Entra ID groups for each application. These groups will be used to commission and decommission on a per app basis for users.
Create a FlexApp One Service Commission Group
The first step in this process is to create a single FlexApp One Service commission group. To do so, complete the following steps:
- Open Microsoft Intune admin center.
- In the left column, click the Groups option.
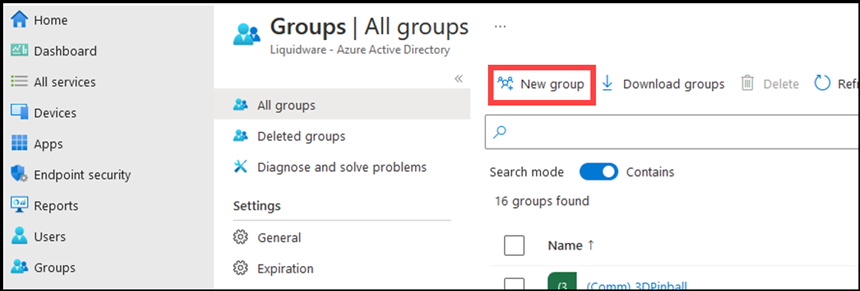
- On the Groups screen that opens, click the New group button.
-
- On the New Group screen that appears, select Security in the Group type field.
- When creating a new group, the Group name should make reference to the application with which it is associated. So, since this group is being created for the Installer.intunewin service application, the group name should be (Comm) FlexApp One Service.
- In the Membership type field, select Assigned.
- (Optional) In the Owner field, click the No owner selected link, then specify an owner for the group from the Add owners field that appears.
- Click the Create button to add the group.
-
Note: It might take a short while for the group to show up in the list. Refresh the screen periodically until the group appears.
Create Separate Commission Groups for Each Application
The next step in this process is to create separate commission groups for each application, such as FlexApp. To do so, complete the following steps:
- Open Microsoft Intune admin center.
- In the left column, click the Groups option.
- On the Groups screen that opens, click the New group button.
-
- On the New Group screen that appears, select Security in the Group type field.
- When creating a new group, the Group name should make reference to the application with which it is associated. In this example, the group is being created for the FlexAppOne-Application-X.intunewin application, so the group name should contain FlexApp. In this example, it is (Comm) FlexAppOne-Application-X. If the application were ChromeEnterprise, the name would be (Comm) ChromeEnterprise.
- In the Membership type field, select Assigned.
- (Optional) In the Owner field, click the No owner selected link, then specify an owner for the group from the Add owners field that appears.
- Click the Create button to add the group.
-
Note: It might take a short while for the group to show up in the list. Refresh the screen periodically until the group appears.
- Repeat the steps above to create a new commission group for each remaining application.
Create a FlexApp One Service Decommission Group
The third step in this process is to create a single FlexApp One Service decommission group. To do so, complete the following steps:
- Open Microsoft Intune admin center.
- In the left column, click the Groups option.
- On the Groups screen that opens, click the New group button.
-
- On the New Group screen that appears, select Security in the Group type field.
- When creating a new group, the Group name should make reference to the application with which it is associated. So, since this group is being created for the Installer.intunewin service application, the group name should be (DeComm) FlexApp One Service.
- In the Membership type field, select Assigned.
- (Optional) In the Owner field, click the No owner selected link, then specify an owner for the group from the Add owners field that appears.
- Click the Create button to add the group.
-
Note: It might take a short while for the group to show up in the list. Refresh the screen periodically until the group appears.
Create Separate Decommission Groups for Each Application
The final step in this process is to create separate decommission groups for each application, such as FlexApp. To do so, complete the following steps:
- Open Microsoft Intune admin center.
- In the left column, click the Groups option.
- On the Groups screen that opens, click the New group button.
-
- On the New Group screen that appears, select Security in the Group type field.
- When creating a new group, the Group name should make reference to the application with which it is associated. In this example, the group is being created for the FlexAppOne-Application-X.intunewin application, so the group name should contain FlexApp. In this example, it is (DeComm) FlexAppOne-Application-X. If the application were ChromeEnterprise, the name would be (DeComm) ChromeEnterprise.
- In the Membership type field, select Assigned.
- (Optional) In the Owner field, click the No owner selected link, then specify an owner for the group from the Add owners field that appears.
- Click the Create button to add the group.
-
Note: It might take a short while for the group to show up in the list. Refresh the screen periodically until the group appears.
- Repeat the steps above to create a new decommission groups for each remaining application.
Checklist
-
Did you create two groups for the FlexApp One Service: (Comm) FlexApp One Service and (DeComm) FlexApp One Service
-
Did you create a commission and a decommission group for each application? Do the names contain the application name, such as (Comm) ApplicationName and (DeComm) ApplicationName?
Final Note
There are many ways to control commissioning and decommissioning, but you should use this method initially before attempting to modify the process.