Configurations, filters, and many other objects in the ProfileUnity Management Console are displayed in lists that can be organized and sorted.
The lists are displayed in a standard grid fashion with column headings at the top and one item listed per row. The footer row contains some additional options to navigate through the list views. The example below is from the default Configuration Management screen.

Working with Columns
The list view columns can be expanded, contracted, or reordered, and the data within each list can be sorted. Right-click the header of any column to see a list of all columns available, allowing you to add, remove, or reset which columns are displayed.
To change a column’s width, go to the right-hand border of the column whose width you want to change. Hover your mouse until you see the cursor change to the double-sided arrow. Left-click and drag your mouse right or left until the column is your preferred size.
To change the order in which the columns are displayed, left-click the column you want to move and drag it to its new position.
To sort a list based on a particular column, left-click the column heading. The column will first be displayed in ascending order. Left-click the column heading a second time to sort the data in descending order. Small up and down arrows will be displayed next to the column name indicating which column the list is sorted by and whether it is sorted in ascending or descending order.
Ordering Rows in the List
Some lists can be ordered to indicate in which order a specific rule should be applied. To change the order, left-click the number column and choose a new order number. Note that other settings in addition to an item’s order number can also affect where an item appears in an ordered list, such as sorting by another column.

Making Mass Updates to List Items
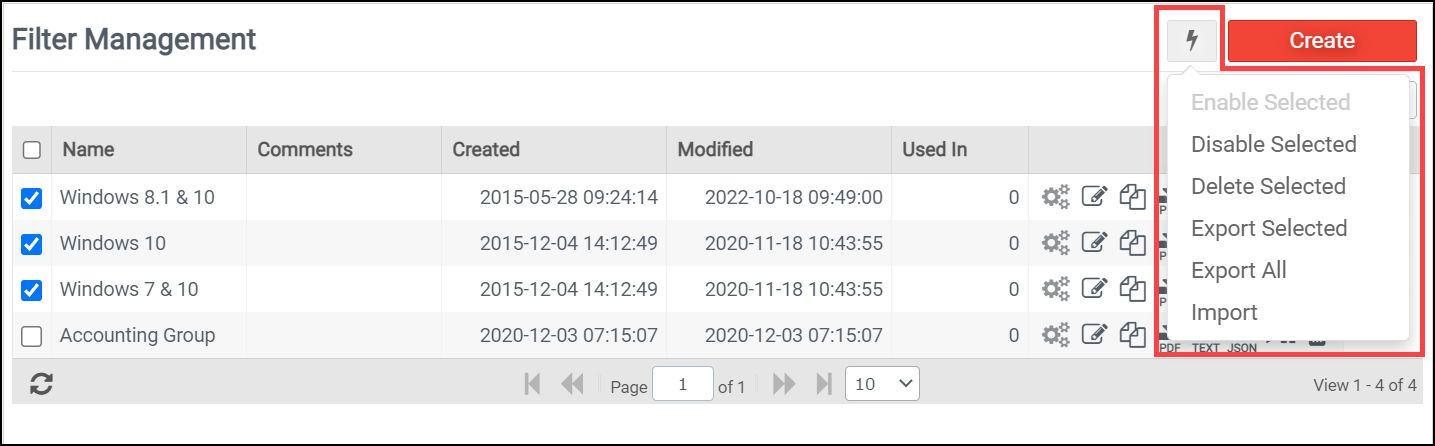
Many lists in the console include options in the Lightning Bolt menu that allow you to mass update selected items in the list. The image below, from the Filter Management console, shows how changes can be applied to multiple filters at the same time, but the same functionality can be applied to things like module rules, inventory items, portability rulesets, and so on. Selected items are saved when navigating between modules within a configuration, allowing mass updates to be performed across multiple modules at once.
Navigating Using Options in the Footer
There are several more navigational options available in the list view footers. Not all options are available in every list.
To refresh a list view, click the ![]() (Refresh) icon in the bottom left corner of the list table. This will reload the table you are currently viewing.
(Refresh) icon in the bottom left corner of the list table. This will reload the table you are currently viewing.
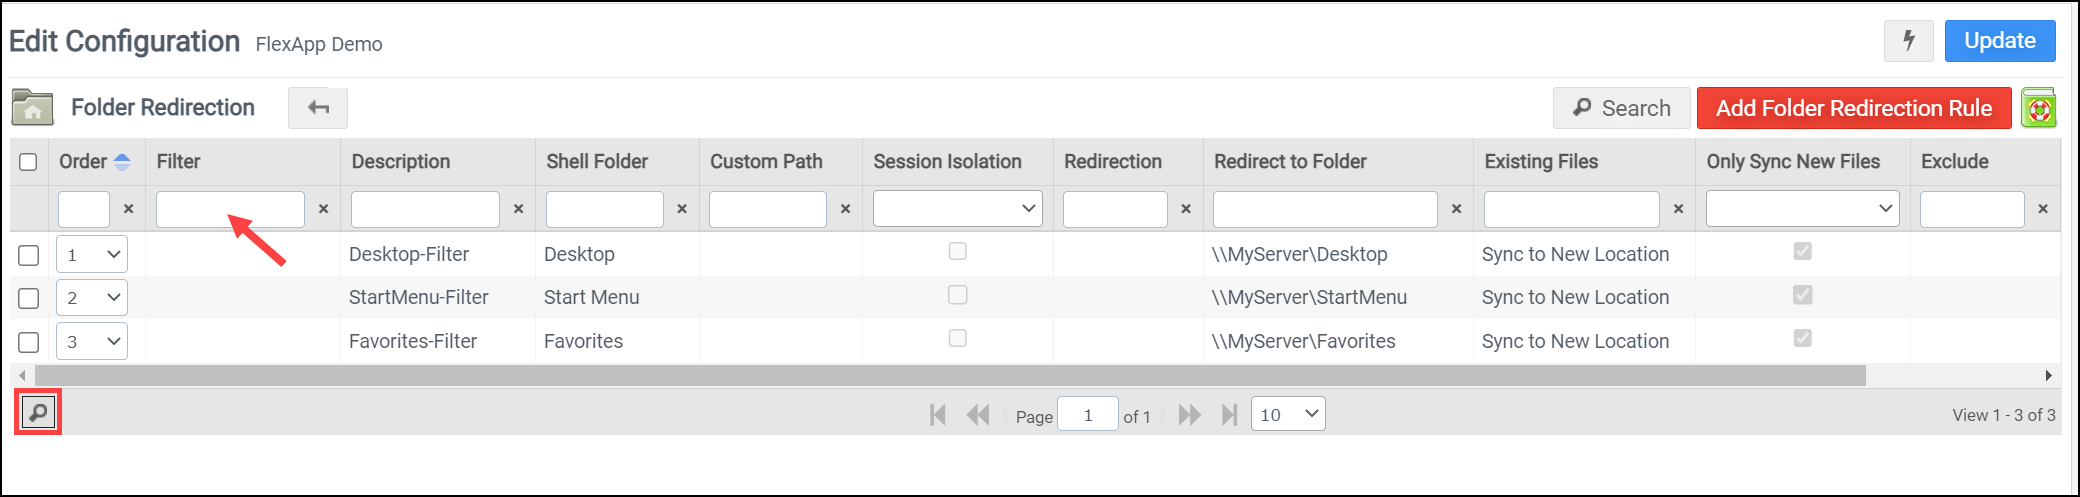
To narrow down long lists and focus on specific items, you can toggle the column search toolbar using the ![]() (Search) icon, sometimes seen in the bottom left of the list grid. When the Search icon is pressed, each column header will include a search bar. Enter text in as many of the search bars as you like to narrow down the number of items displayed based on the number of matches found. To clear the search criteria for a column, click the X button next to the search bar.
(Search) icon, sometimes seen in the bottom left of the list grid. When the Search icon is pressed, each column header will include a search bar. Enter text in as many of the search bars as you like to narrow down the number of items displayed based on the number of matches found. To clear the search criteria for a column, click the X button next to the search bar.
When lists are long, the paging options in the center of the footer will help you navigate. You can select to show 10, 20, 30, 50 or 100 items per list view. The page text box allows you to directly select which page to show in the view. Use the double arrows to move one page forward or backward at a time or use the arrow with a bar to jump to the first or last page of a list.
The numbers on the right of the footer let you know how many total items you have in your list and which of those items you are currently viewing.